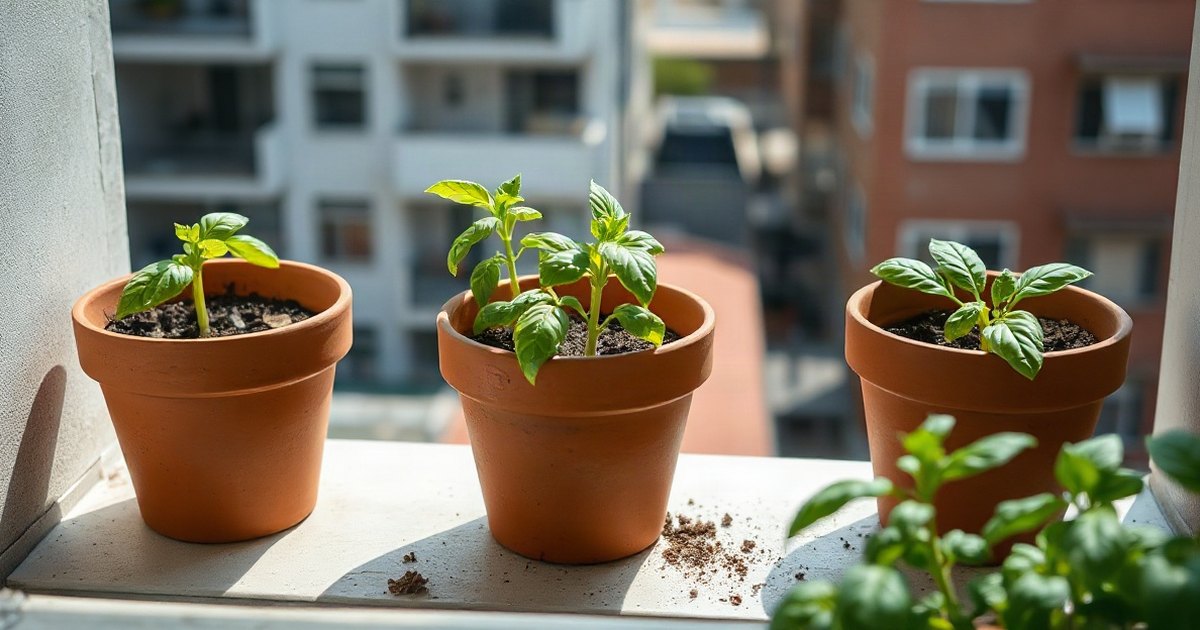
You have a balcony, a few hours a week, and a desire to grow your own food. But between the limited space, confusing advice, and fear of failure, you haven’t started. You’re not alone. Starting a balcony vegetable garden is simpler than it seems when you focus on the right crops, the right containers, and a realistic plan.
The short answer: Start with three 5-gallon fabric pots or one 24-inch window box. Fill them with a quality potting mix, not garden soil. Plant two cherry tomato plants (like ‘Sweet 100’), a six-pack of lettuce (‘Black Seeded Simpson’), and a few basil seeds. Place them where they get at least 6 hours of sun, water when the top inch of soil is dry, and harvest in weeks. You’ll learn more from three successful plants than from thirty that struggle. This guide walks you through every step, from checking your weight limit to picking your first seeds.
Why Start a Balcony Vegetable Garden? (Is It Worth It?)
Before you buy a single pot, it’s fair to ask if the effort pays off. For most people on a balcony, the answer is a resounding yes, but not always for the reasons you might think. The benefits of container gardening extend far beyond just a few fresh tomatoes.
The most immediate reward is taste. A sun-warmed cherry tomato picked from your own plant and eaten immediately is a different food entirely from the hard, refrigerated ones from the store. Herbs like basil and cilantro are exponentially more fragrant and flavorful when picked minutes before you need them. This isn’t just gardener’s pride; it’s a tangible difference in quality that makes even a small harvest feel luxurious.
Beyond the plate, gardening is a proven stress-reliever. The simple, repetitive tasks of watering, checking leaves, and tending to plants provide a mental break from screens and daily pressures. Studies, including one published in the Journal of Health Psychology, have shown that gardening can lower cortisol levels (the stress hormone) and improve mood. Your balcony becomes a tiny, productive retreat.
Finally, there’s the practical advantage of control. Container gardening allows you to create the perfect environment for each plant. If a plant needs more sun, you can move it. If the soil is wrong, you can change it instantly. You avoid the backbreaking work of tilling soil and weeding large plots. For a complete breakdown of the costs versus the yields, see our detailed analysis in Is Container Gardening Worth It?.
What You Absolutely Need to Check First
Excitement is good, but safety and rules come first. A few quick checks now will prevent major headaches (or worse) down the line. This is the most important but most often skipped step in balcony vegetable gardening.
1. Your Balcony’s Weight Limit
Containers, soil, and plants are heavy, especially when wet. A single 5-gallon plastic pot filled with damp potting mix can weigh over 40 pounds. Multiply that by several pots, and you can easily add hundreds of pounds to your balcony. Most building codes design balconies for a uniform load of 40-60 pounds per square foot (psf), but this varies wildly. You must check your balcony weight limit before you buy anything. The simplest way is to contact your building manager or landlord. If that fails, distribute weight by placing heavier pots against the load-bearing wall and using lighter materials like fabric pots.
2. Sun Exposure (Aspect)
Plants are solar-powered. The single biggest factor in your success is how much direct sunlight your balcony receives. “Full sun” means at least 6-8 hours of direct sun per day. To find yours, note the direction your balcony faces:
- South-facing: Gold standard. Gets the most sun all day. Ideal for tomatoes, peppers, eggplant, cucumbers.
- West-facing: Good. Gets strong afternoon and evening sun. Good for most sun-loving crops.
- East-facing: Decent. Gets gentle morning sun. Best for leafy greens, herbs, and some root vegetables.
- North-facing: Challenging. Gets little to no direct sun. Stick to shade-tolerant herbs like mint and parsley, or leafy greens like spinach and lettuce.
Spend a sunny day observing your space. Note when the sun hits the floor and for how long. This is your sun map.
3. Rules and Regulations
Check your lease or condo rules. Some buildings have restrictions on what can be placed on balconies, forbid hanging planters from railings for safety reasons, or have rules about drainage and watering to avoid affecting neighbors below. A quick check now ensures your garden doesn’t get a violation notice later.
The Essential Container Gardening Toolkit
You don’t need a shed full of gear. For a beginner, a small, focused kit is all you need to succeed. Our guide Balcony Garden Starter Kit: Everything You Need for Under $100 covers this in detail, but here’s the core list.
Containers: Your Plant’s Home
The container is your plant’s entire world. Size and drainage are non-negotiable. A good rule of thumb: bigger is almost always better. More soil means more nutrients and water for roots, leading to healthier plants.
- Fabric Pots: Excellent choice for beginners. They are lightweight, affordable, and provide excellent air pruning (which prevents roots from circling and becoming rootbound). A 5-gallon fabric pot is perfect for a single tomato, pepper, or cucumber plant.
- Plastic Pots: The most common and inexpensive option. Look for pots that are at least 12 inches deep and wide for most vegetables. Ensure they have multiple drainage holes.
- Self-Watering Planters: A great investment if you travel or tend to forget watering. They have a reservoir that wicks water up to the plant’s roots. A 24-inch self-watering window box is ideal for lettuces and herbs.
- What to Avoid: Never use containers without drainage holes. Avoid small decorative pots (under 8 inches) for vegetables—they dry out too fast.
Potting Mix: Not Garden Soil
This is the most common beginner mistake. Do not shovel soil from the ground into your pots. Garden soil is too dense, compacts easily, and can harbor pests and diseases. You need a potting mix (or soilless mix), which is specifically formulated to be light, fluffy, and well-draining in a container.
A good quality Pro-Mix potting mix or similar brand is perfect. For a budget option, you can make your own mix with 1 part coco coir (a sustainable peat moss alternative), 1 part compost, and 1 part perlite or vermiculite for aeration.
Seeds vs. Seedlings
For your first garden, we strongly recommend starting with seedlings (young plants) from a local nursery for your main crops. It’s faster, easier, and gives you a head start. Buy a six-pack of lettuce or a 4-inch pot of basil. For tomatoes and peppers, look for short, stocky plants, not tall, leggy ones.
Seeds are cheaper and offer more variety, but they require more attention. Start by direct-sowing easy seeds like radishes, carrots, and beans right into your pots. You can graduate to seed starting later.
Basic Tools
You only need three:
- A hand trowel for planting and mixing.
- A watering can with a gentle rose (shower head) to avoid washing away soil.
- A pair of pruning snips or sharp scissors for harvesting.
How to Choose Your First Plants
The thrill of picking plants is real, but restraint is key. Start with a few easy, high-success crops that give you a quick return. This builds confidence. Avoid the temptation to grow giant pumpkins or sweet corn—they need far more space and sun than a balcony can provide.
The Best Balcony Vegetables for Beginners
These plants are forgiving, productive, and perfectly suited to life in a pot.
- Leafy Greens (Lettuce, Spinach, Kale, Swiss Chard): The easiest place to start. They don’t need deep soil (a 6-inch deep planter works) and many can tolerate some shade. You can harvest individual leaves for weeks in a “cut-and-come-again” method. ‘Black Seeded Simpson’ lettuce and ‘Red Russian’ kale are fantastic varieties.
- Cherry Tomatoes: The quintessential container tomato. They fruit heavily and continuously. Choose determinate (bush) varieties like ‘Terenzo’ or ‘Tumbling Tom’ that stay compact, or a small indeterminate variety like ‘Sweet 100’ if you have a trellis. They need a 5-gallon pot and full sun.
- Peppers: Both sweet and hot peppers thrive in containers. They are compact and love heat. ‘Shishito’ peppers are prolific and great for frying, while ‘Cayenne’ is a classic hot pepper. One plant per 3-gallon pot.
- Bush Beans: Incredibly easy to grow from seed. They germinate quickly and produce a lot of beans in a small space. ‘Provider’ or ‘Blue Lake’ bush beans are reliable. Plant seeds in a 12-inch wide pot.
- Radishes: The fastest vegetable you can grow. From seed to harvest in as little as 25 days. They are perfect for filling small gaps in planters.
- Herbs (Basil, Cilantro, Parsley, Mint, Thyme, Oregano): Highly rewarding. You’ll use them constantly in cooking. Basil and cilantro are annuals (need replanting each year), while mint, thyme, and oregano are perennials (will come back). Warning: Plant mint in its own pot; it’s incredibly invasive and will take over any shared space.
What to Avoid Your First Year
Be honest with your space. These plants are typically not worth the effort on a small balcony:
- Large Squash (Zucchini, Pumpkins): They are space hogs, require massive containers (20+ gallons), and are prone to powdery mildew.
- Corn: Requires wind pollination from a large block of plants, not just a few stalks.
- Full-Size Tomato Vines (Beefsteak, etc.): They need very large pots (10+ gallons) and tall, sturdy cages that can be impractical on a balcony.
- Potatoes: Possible but yield is low for the amount of soil and space required.
- Asparagus & Rhubarb: These are perennial plants that need to establish for years before a harvest—not ideal for renters.
Step-by-Step: Planting Your Container Garden
It’s time to get your hands dirty. Follow these steps to give your plants the best possible start.
Step 1: Prepare Your Containers
Ensure your pots are clean and have drainage holes. If you’re using a fabric pot, you’re all set. For a plastic pot without holes, drill 4-5 1/2-inch holes in the bottom. Place a single piece of broken pottery or a small coffee filter over the holes to prevent soil from washing out while still allowing water to drain.
Step 2: Fill with Potting Mix
Moisten your potting mix in a large bucket before filling your pots. Dry mix can be hydrophobic and will initially repel water. Fill the pot to within 1-2 inches of the rim. Do not pack it down tightly; you want it loose for roots to grow easily.
Step 3: Plant Your Seedlings or Seeds
For seedlings: Gently squeeze the sides of the nursery pot to loosen the root ball. Tip it upside down, supporting the plant’s stem with your fingers, and gently ease it out. If the roots are tightly wound (rootbound), gently tease them apart at the bottom. Dig a hole in your prepared container that’s slightly larger than the root ball. Place the plant in the hole so the top of its soil is level with the top of your container’s soil. Fill in around it and gently firm the soil.
For seeds: Follow the depth instructions on the seed packet. A general rule is to plant a seed twice as deep as it is wide. For small seeds like lettuce, just press them lightly into the soil surface and sprinkle a thin layer of mix over them.
Step 4: Water Thoroughly and Label
Water your newly planted containers slowly and deeply until water runs freely out of the drainage holes. This settles the soil around the roots. Use a plant label or popsicle stick to mark what you planted and the date. You will forget what is where.
Step 5: Arrange on the Balcony
Place your containers according to your sun map. Put sun-lovers like tomatoes in the brightest spot. You can use plant caddies with wheels to make moving heavy pots easier. For more ideas on arranging your space, see Balcony Vegetable Garden Design.
Ongoing Care: Watering, Feeding, and Troubleshooting
Your job now is to keep your plants happy. Container plants are entirely dependent on you for water and food.
Watering: The Most Important Task
Containers dry out much faster than garden beds. The goal is consistent moisture, not a cycle of flood and drought. Stick your finger into the soil up to your first knuckle. If it feels dry, it’s time to water. In the heat of summer, this might be every day. Water deeply in the morning so plants are hydrated for the day and leaves have time to dry, preventing fungal diseases.
Feeding (Fertilizing)
Potting mixes have some initial nutrients, but they get used up quickly. You need to fertilize. A week or two after planting, start with a balanced, water-soluble organic fertilizer like Espoma Garden Tone or a liquid fish emulsion. Follow the label instructions, usually every 2-3 weeks. Over-fertilizing can burn plants, so less is more.
Common Problems and Organic Solutions
You will encounter pests. It’s inevitable. The key is to catch them early.
- Aphids: Tiny green or black bugs on new growth. Blast them off with a strong spray of water from your hose or squish them. Introduce ladybugs if the infestation is bad.
- Whiteflies: Tiny white insects that fly up when disturbed. Use yellow sticky traps placed just above the plants.
- Powdery Mildew: A white, powdery fungus on leaves. Improve air circulation and avoid wetting leaves when watering. Treat with a spray of 1 part milk to 9 parts water.
For a full list of pitfalls, read Balcony Vegetable Gardening for Complete Beginners: 10 Mistakes to Avoid.
Harvesting Your Rewards
This is the best part. Harvesting encourages most plants to produce more.
Harvest leafy greens like lettuce and kale by snipping off the outer leaves, allowing the center to keep growing. Harvest herbs by pinching off the tips of stems, just above a set of leaves. This makes the plant bushier. Pick beans and cucumbers when they are young and tender—if you let them get too big, the plant will stop producing. Pick tomatoes and peppers when they are fully colored and slightly soft to the touch.
Don’t be afraid to harvest. A plant producing food is its purpose.
Key takeaways
- Start small with 2-3 easy crops like cherry tomatoes, lettuce, and basil to ensure success and build confidence.
- Check your balcony’s weight limit and sun exposure first—these are non-negotiable safety and success factors.
- Always use containers with drainage holes filled with potting mix, not garden soil.
- Consistent watering and occasional feeding are the keys to healthy container plants.
- Harvest frequently to encourage more production and enjoy the fruits of your labor.
Frequently Asked Questions
How much time does balcony gardening take each week?
For a small garden of 3-5 pots, expect to spend 15-30 minutes, 2-3 times per week. This includes checking soil moisture, watering, and quick pest inspections. Harvesting is extra and a joy, not a chore.
Can I really grow enough food to make a difference?
Yes, but manage expectations. You likely won’t grow all your vegetables, but you can grow significant amounts of high-value, high-flavor crops like herbs, cherry tomatoes, and salad greens. This can reduce your grocery bill for these specific items and dramatically improve your meals.
What if my balcony doesn’t get enough sun?
Focus on shade-tolerant crops. Leafy greens (lettuce, spinach, kale, mustard greens), herbs (mint, parsley, chives), and root vegetables (radishes, beets, carrots) can all produce well with 4-6 hours of sun or strong dappled light. You can also use a small, portable LED grow light to supplement a few hours of light for sun-loving plants.
Do I need to bring my plants inside for winter?
It depends on the plant and your climate. Tender annuals like tomatoes and basil will be killed by frost and can be composted. Hardy perennial herbs like thyme, oregano, and mint can often survive winter in their pots on a balcony if provided with some protection from wind and extreme cold. For a more detailed guide, explore our articles in the Getting Started category.
Your balcony is waiting to become a source of fresh food and daily satisfaction. Start with one pot this weekend. For more guides, inspiration, and detailed plans, browse all our beginner-friendly resources right here.